 Park Tool Co Founder Howard Hawkins Park Tool Co Founder Howard Hawkins Walk into any bike repair shop and you will notice the distinctive blue tools and repair stands which have become standard equipment in most all American bike shops. Since 1963 Park Tool Company has made it easier and safer for bike techs. to perform their work with innovative designs and a reputation for quality. Check out the link provided below from Bike Magazine showing how Park Tool provides more bike specific tools than any other company in the world. Most of my bike specific tools are from Park Tool Co. and I truly appreciate the tried and true quality of their products. With the recent passing of Park Tool Co Founder Howard Hawkins I just wanted to express my gratitude and condolences. Links Related to this Post: Thank You Howard Hawkins Park Tool, a Lasting Legacy Video Park Tool Factory List Road Bike Review Forum Post | 
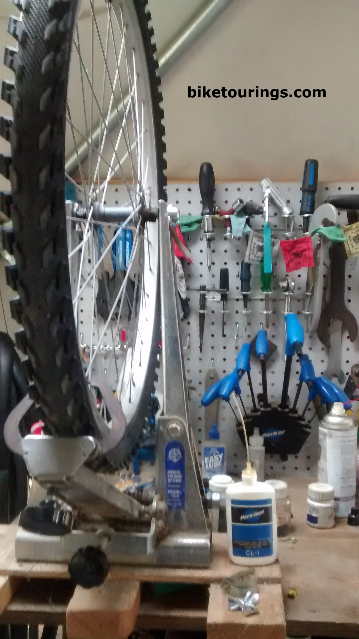
My little bike repair bench is more often than not able to handle my bike repair tasks thanks in large part to Park Tool Co.
|
|
Comments
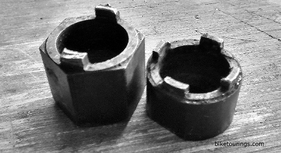 Park Tool FR-2 and FR-3 for Suntour Park Tool FR-2 and FR-3 for Suntour Working on older bikes can be a bit challenging at times. Rust and corrosion contribute to a majority of failed projects either by damaging parts and components in an effort to repair or simply giving up on the stubborn old parts that have succomed to neglect or obsolescence. Having proper tools for bike repair tasks is obvious to anyone who has attempted to work on a bike with a crescent wrench and pliers. Knowing which tool is most appropriate is when knowledge and experience is most appreciated. 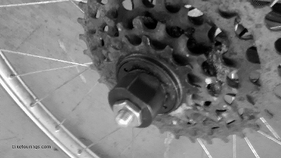 Park Tool FR-3 held in place with axle Park Tool FR-3 held in place with axle It's not a common task to remove an old Suntour freewheel so while I observed the initial efforts to remove the freewheel with the appropriate tool I noticed that the tool wasn't being held in place with an axle or quick release skewer. After several attempts to remove the freewheel and consequently having the tool slip out of the freewheel to be removed I finally grabbed an old bolt on axle to hold the tool in place. This was a particularly stubborn freewheel to remove so a quick release may not have done the trick. I have both Suntour freewheel removal tools from Park Tool. The FR-3 has four splines and the FR-2 (photo above left) has two. For real stubborn parts the four splined FR-3 works better.
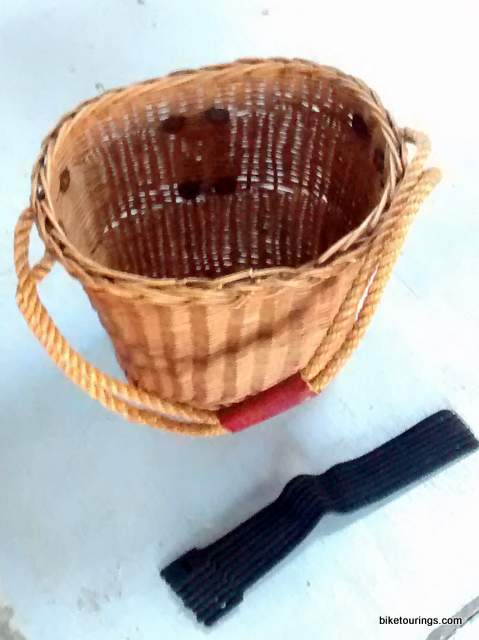
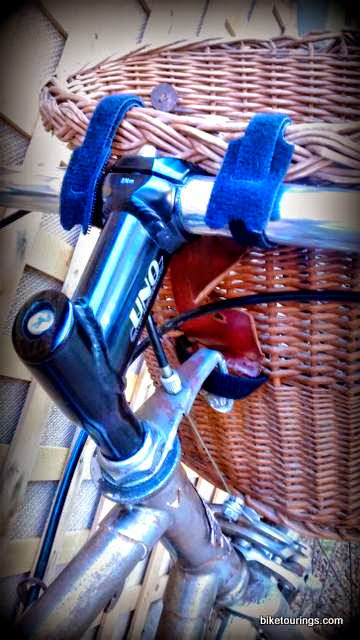
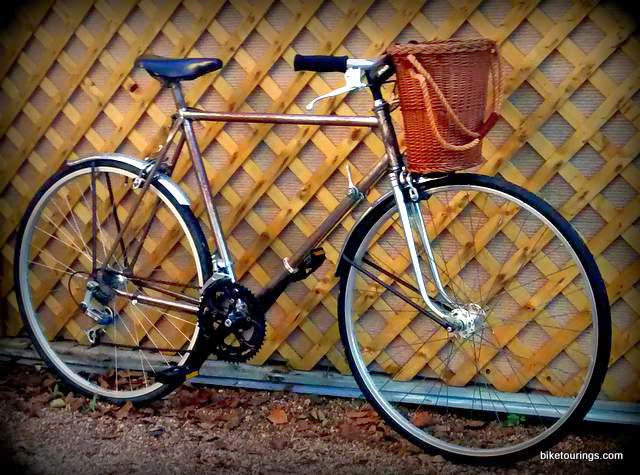 Thrift Store shopping offers fun DIY handlebar basket projects for bike commuting. This basket was installed with four points supporting it. Obviously the first two Velcro Straps on the handlebars with a third strap wrapped around a steel front reflector bracket which helps to keep the basket from shifting side to side while riding as shown in upper right photo. Fourth is the steel chrome fender which protects the basket and tire from each other with the basket barely touching the fender.
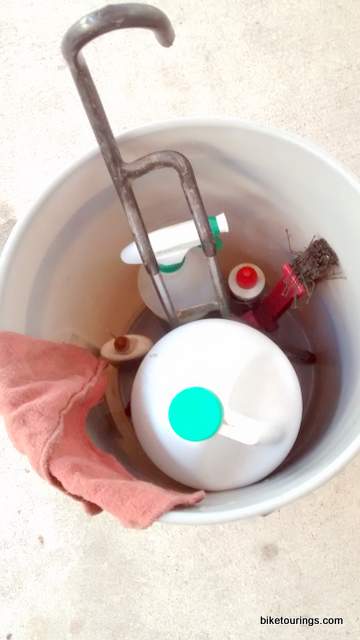
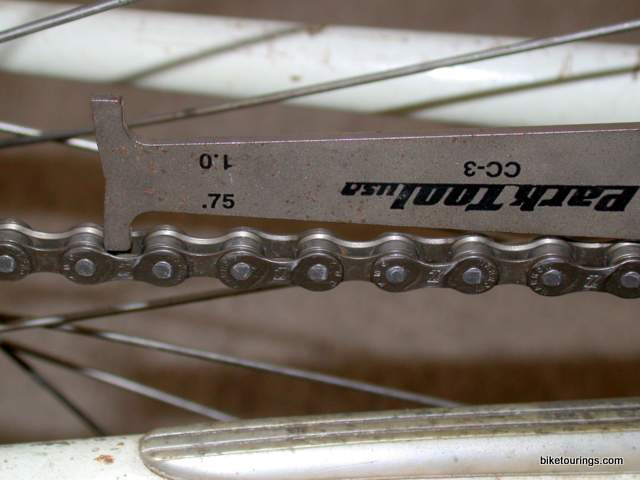
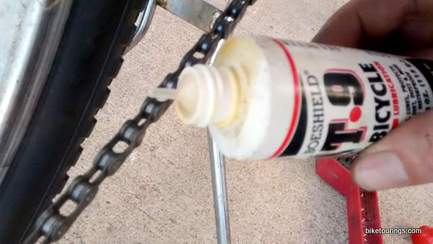
We placed a gallon water container in the basket with the basket proving more than able to support and carry the load. I am confident this basket could safely transport ten pounds efficiently and look good doing it. I look forward to running some grocery and other errands with it over the weekend. Will add photos of my fun filled rides, now that I have a basket for it. Cheers! Simple Chain Maintenance Kit for Bike Commuting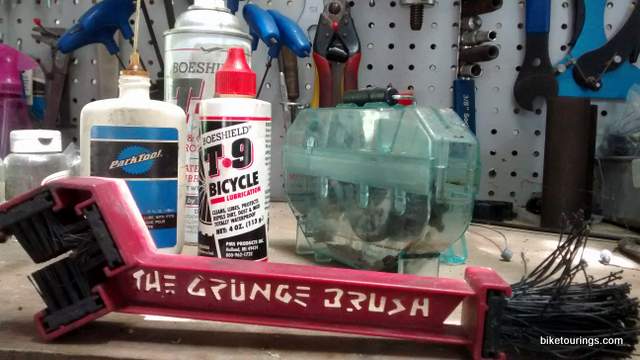 Chain maintenance made much easier when you know what works. There is so much information regarding chain maintenance it can be daunting for new comers to bike commuting who simply want an efficient and affordable method of bike chain maintenance. As Sheldon Brown noted it is perhaps the most controversial of bike maintenance topic there is. Well, if you'd like to jump ahead and research all the definitions and terms referring to why chain stretch is a misleading term, what's a good chain and why, what cleaners to use and which lubes to avoid based on wet or dry conditions with explanations of chemical detergents and how they can harm your chain, etc. then skip this article and go to links provided at the end of this post. If you would like to know a quick, quality method for maintaining your commuter bike's chain then use the following methods we have used for years in servicing many happy customers' bikes. Whether they were hard core road bike racers or fair weather bike commuters we never had a dissatisfied customer. There are basically three things to list for drivetrain and chain maintenance: Clean, Check Wear and Lube. How often? When a new chain is put on a bike it is recommended to not clean and lube the chain until the original packing grease has been worn away. At the first sound of a dry squeak clean and lube it. After completing that routine a couple times you will get to know you're own particular schedule for chain maintenance. Many factors contribute to how frequently your chain will need attention and varies from bike to bike depending on how many miles you ride, on or off road, wet or dry,etc. A chain cleaning and lube technique which I am sharing here has worked for all types of bikes regardless of riding conditions. In my experience it is not only the quickest and easiest way to clean the chain it is also the longest lasting between applications as well as providing long life to chain and all drivetrain components. Scroll down to see photos that help to illustrate each step of this simple and easy process. If you don't have a bike repair stand or the space for one, you can get a twenty dollar Sunlite Bottom Bracket Type Bicycle Display Stand, oh and a five gallon bucket to store the following list of items in. Just yesterday I was out on one of my bike commutes and found a nice quality shop rag and felt it was a good idea to share this tried and true chain cleaning technique for bike commuters.
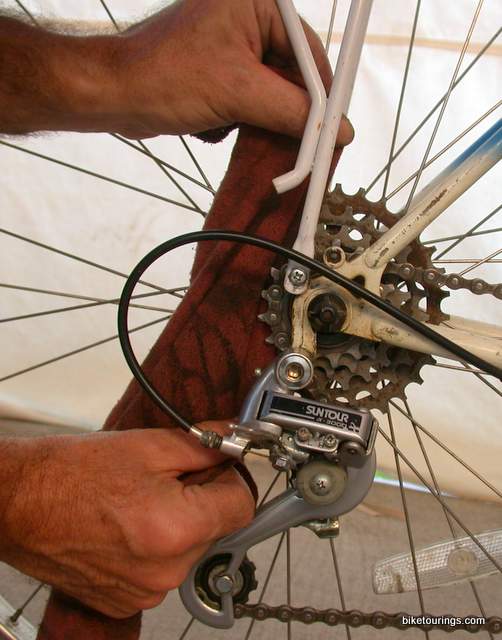
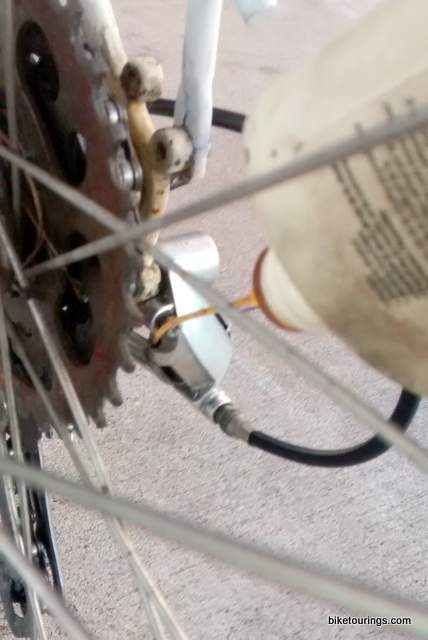
 Bike Chain Maintenance for any type of bike Bike Chain Maintenance for any type of bike
Links related to this topic: Sheldon Brown discussed all the finer details and then some.
Pink Bike Article regarding Chain Lube Lennard Zinn's Video  Used and a bit abused, Topeak Joe Blow Pro Used and a bit abused, Topeak Joe Blow Pro Finding a good shop quality floor pump proved to be a bit of a challenge. We had two of Park Tool's shop quality floor pumps seize up on us and used the Home Mechanic Model instead. Shop quality air compressors are standard of course but the atmosphere of our coffee customers necessitated a more quiet method for our particular shop's needs. After much experience with various floor pumps either failing to perform under the rigors of everyday shop use or simply not efficient enough for rapid tire inflating I decided to try the Topeak Joe Blow Pro Bike Floor Pump. The pump itself proved to be a very dependable tool and we used it daily for at least two years. After eighteen months we overhauled it with a Rebuild Kit for Joe Blow. Not bad considering we used it in place of a compressor and we had several folks a week needing flat repair with all the thorns along the bike commuter path. 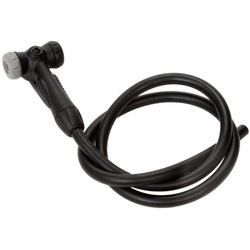 Sunlite Twinhead Pump Hose Kit Sunlite Twinhead Pump Hose Kit My only complaint about Topeak's Joe Blow Pro is the so called smart head, which is supposed to be able to switch from presta to schraeder valve simply by shoving the smart head onto the valve. It never worked consistently enough to be very dependable and we had switched the original smart head out for a new one considering how many times the thing had been dropped on our concrete work floor. We kept two pumps using the Topeak Joe Blow Pro for presta valve and the Park Tool Home Mechanic model for schraeder valve. This was a practical solution as most of the schraeder valves were typically on lower pressure tires.
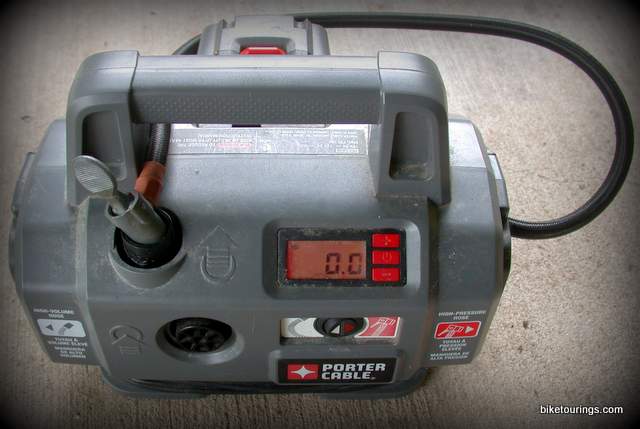
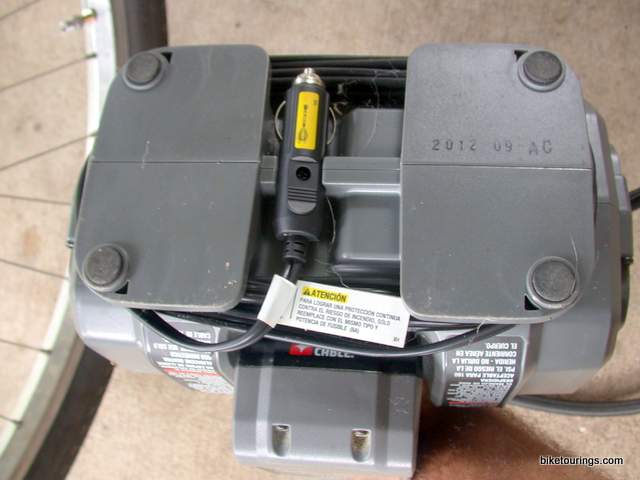
After researching the issue I found it to be a very common complaint regarding Topeak's so called "smart head". An affordable and practical solution is to replace the hose and head with one like the Sunlite Twinhead Hose Pump Kit. Despite the criticism of that pump I still recommend it as a very good quality pump as I still occasionally use that pump which is approximately ten years old with only one rebuild kit having been installed. These days I use my Porter Cable Inflator on most of our bikes but keep that old pump around as a solid backup when needed.  PORTER-CABLE PCC583B 18-Volt Inflator PORTER-CABLE PCC583B 18-Volt Inflator One of my jobs in the bike industry had me overseeing bike assembly, performing advanced bike repairs and maintaining the bikes on the retail sales floor. As I was required to use my own tools I noted the dependability and performance of the Park Tool PMP 5 frame pump for adding air to the display bikes' tires as needed. However, based on that experience when I saw the Porter Cable PCC583B 18 Volt Inflator while shopping at our local hardware store I snatched one up. I really like the digital pressure gauge which can be preset. For a high pressure tire this enables me to do other things while the tire inflator is running as it automatically shuts off when it reaches the pre determined pressure. This is nice for car and truck tires as well. I have a utility trailer and when I need to top off the air pressure not only is the pre-setting of the pressure nice to have, Porter Cable's little tire inflator when used with the battery enable me to reach the trailer tires without having to unhitch my vehicle to use the 12 volt cord. As my Dome workshop is solar powered this handy little tire inflator from Porter Cable has been a welcome addition with ability to perform on the 12 volt plug and cord supplied with product or off of the 18 volt Lithium ion battery, which must be purchased separately. Since I have owned a set of Porter Cable power tools for a couple of years now I already had a couple of batteries. However, Porter Cable has enabled this product to run off of either the older ni cad batteries or the newer more pricey lithium ion batteries and have thoughtfully provided a single battery charger for both types of batteries with the PORTER-CABLE PCXMVC Multi-Chemistry Slide Pack Charger.
Porter Cable's Tire Inflator is not meant to replace a typical workshop air compressor or a good quality bike floor pump. It is an excellent choice for flat repair, conveniently adding air to maintain tire pressure particularly if you own several bikes and is very nice to have on a road trip in a car and maintaining car or truck tire pressures. If you're one of those folks who enjoys DIY gadgets and tools, this is a good product. Click any of links or photos for product information or purchase.
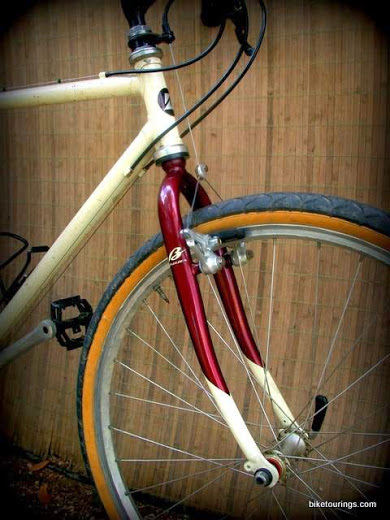
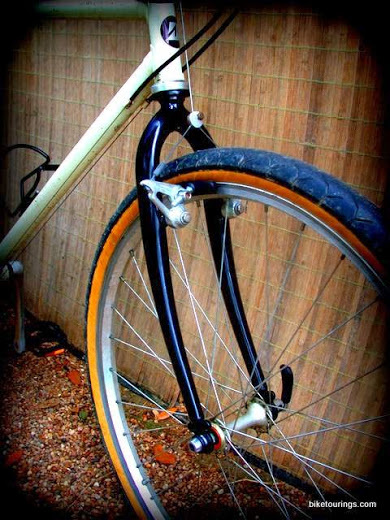
Other accessories which come with that product are ball needle, and second hose with airport for filling air mattresses or yoga balls with various sized plastic tips. One Inch Threaded Mountain Bike Replacement Forks from Breezer and Sunlite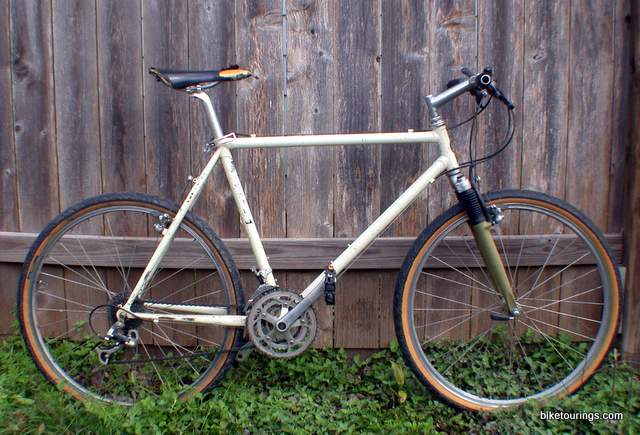 '93 Bridgestone MB 1 mountain bike for touring and commuting '93 Bridgestone MB 1 mountain bike for touring and commuting One of the joys of bike repair is finding older bikes worthy of refurbishing. When I heard about this classic steel lugged '93 Bridgestone MB 1 mountain bike I had to check it out. I got the bike for a very reasonable price and immediately went about converting the riding position to a more relaxed style for touring and commuting. Bridgestone bikes from that era built with Ritchey Logic tubing are very desirable to many Bridgestone aficionados as the thin strong steel makes for a very lightweight frame and when combined with the original rigid Ritchey fork it's one of the most lightweight steel mountain bikes ever produced. The suspension fork that came with the bike had to be replaced when I discovered the one inch threaded steer tube was so stripped that the headset could not be removed to service the bearings. After having to cut the steel tube to remove the fork I was able to salvage the original aluminum headset parts that were obviously damaged from some previous owners efforts to work on it. I was looking for a one inch threaded fork and received two models for consideration. First fork I installed is a nice commuter bike model from Breezer. A nice, lightweight rigid one inch threaded fork at 1040 g. The Breezer fork has threaded eyelets for rack and or fenders with a nice rake to it. While replacing the fork I decided to swap out the original eight inch long Ritchey stem and flat bar with a 95mm stem and some Touring Trekking bars in a 25 degree sweep. Add some inexpensive foam grips and felt good about the project thus far. Didn't like the red so much and when I noticed the double eyelets of the Sunlite fork I decided to install that one as both forks use a 27 mm crown race it was convenient and easy to do. Sunlite's fork has a longer steer tube of approximately 3/4 inches which meant cutting the threaded fork to fit, an easy task with proper cutting guide tools.
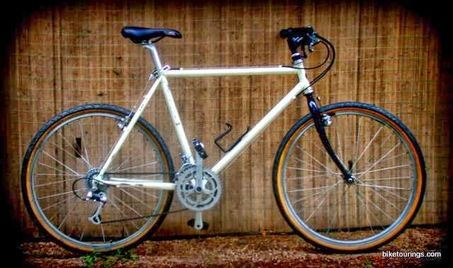 After installing the Sunlite Fork and taking it for a test ride with the Trekking bars and UNO stem I felt like riding it further to get a feel for the bike's overall performance. With the XT Thumbshifters and no sign of wear on the chain the bike is quick, light weight and not as twitchy as it was with the longer stem and flat bars. Here's a combination of components I used for this project and has proven to work out very nicely in providing a quality, comfortable commuter bike in keeping with performance and handling.
For bike folks needing a one inch threaded fork or wanting to replace a worn out suspension fork check out these forks from Breezer and Sunlite, respectively. Here's a link for the 27 mm crown race as it can sometimes be hard to get as that size is frequently out of stock. DIY Brake Lever Tips for Velo Orange Handlebars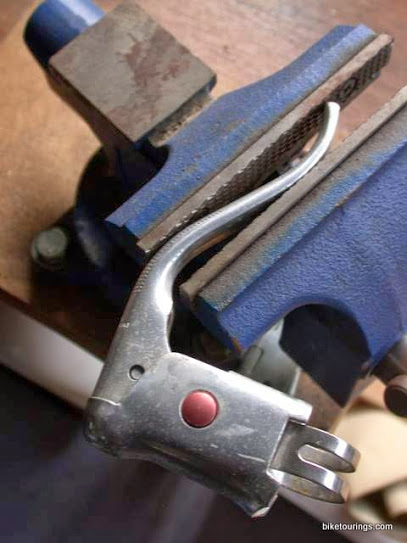 Reshaping non aero brake levers for commuter bike Reshaping non aero brake levers for commuter bike A fellow bike appreciation friend who honors the quality of old steel lugged frames and such recently commented about how much he "hates retro bikes with a passion". His rant had more to do with bikes refurbished in keeping with an older bike's original design and components with their inherent inability to perform or function satisfactorily. An example he focused on is older non aero drop bar brake levers which typically provide poor comfort on the small rubber covers or "hoods" and simply do not provide enough comfortable braking power. Hmm, debatable as anything else I suppose and to each their own. However I enjoy finding use for components as I see fit, it helps to keep me open minded for solutions to repairs or other modifications. 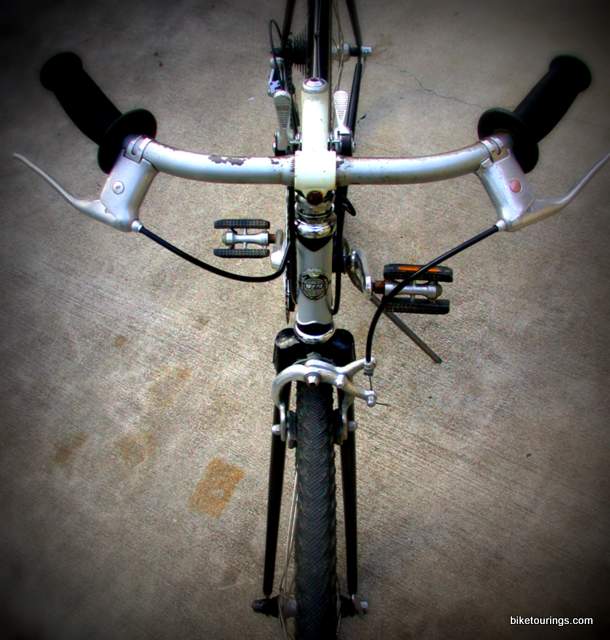 Non aero caliper levers used on custom trekking bar Non aero caliper levers used on custom trekking bar I have found a nice use for the non aero brake levers particularly when converting drops bars to a trekking or touring style handlebar as pictured here when I modified a '70's Vista Summit steel lugged eighteen speed. I wanted to convert the old drivetrain to a 24 speed cafe style bike without having to fork out a lot of money and I was confident of having plenty of spare parts kicking around the shop. After cutting and bending the steel handlebars to shape it is necessary to straighten the non aero caliper levers for sufficient clearance for the flat style bar as pictured above. Recently I decided to add the Velo Orange Porteur Handlebars to our Puch Bergmeister in a classic commuter style for running errands. 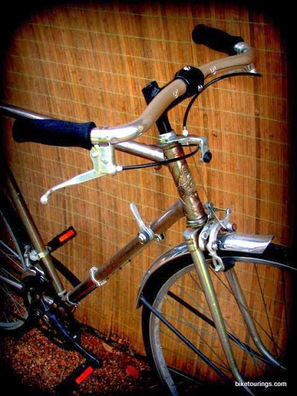 Velo Orange Porteur Handlebars with VO brake levers Velo Orange Porteur Handlebars with VO brake levers Velo Orange provides quality craftsmanship with original retro styling which works very nicely in retro fitting components for bike restoration projects. When I removed the drop bars from the Puch Bergmeister I decided to leave the bar tape, levers and orignial copper stem intact as an option so I didn't use the non aero brake levers to be modified. Velo Orange Porteur Handlebars have an outside diameter of 23.8 mm so conventional caliper levers will not fit. Velo Orange offers their City Levers which are a very simple design and uses a standard mountain bike style brake cable, whereas the modified non aero levers use the road style brake cables. At the very reasonable price of twelve bucks and free shipping I didn't see the point in tearing apart the original drop bars to use the brake levers. However, the old non aero levers will fit the 23.8 mm Porteur Handlebars. Just another reason I appreciate those old retro bike parts. Nothing against Velo Orange City Levers but I personally like the style of the modified non aero levers better than the City Levers. So, if you're looking to install some Velo Orange Handlebars with the 23.8 mm diameter and you have some old non aero brake calipers dormant in your parts bin pull them out and use them, they work great. Happy Spring, good time to get those bike projects going for a fun year of riding. Cheers! Velo Orange Porteur Handlebars can be used with Inverted Brake Levers or Bar End Shifters as well. I went with the City Levers as I may install Bar End Shifters later.
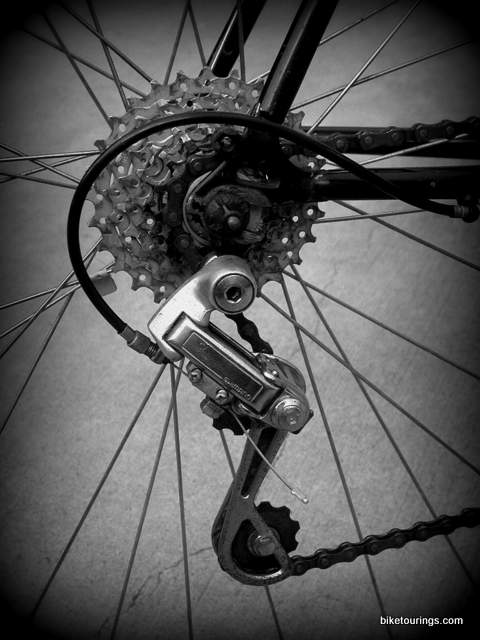
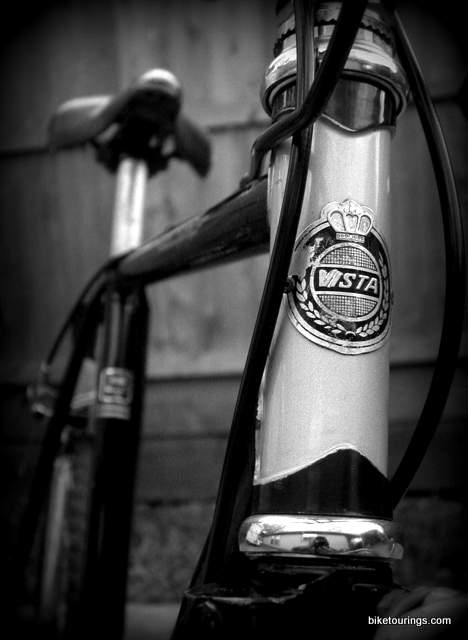
 Photo shows replacement of front fork for bicycle touring and commuting 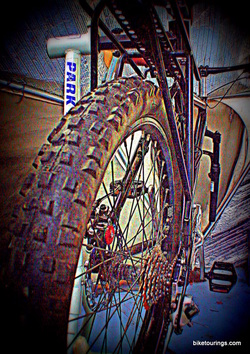 Mini Fat Tire Build with Kenda Kinetics Mini Fat Tire Build with Kenda Kinetics In pursuit of the ultimate multiple surface, multiple terrain touring and commuting bicycle? With the ever expanding market of fat tire and touring expedition bikes, popularity in that style of bike is here to stay. As I was perusing fat tire mountain bike reviews, forums and the like I read the following statement; "to me $1,500 is not a lot to spend on a bike". That quote relates to the low end price of a quality "fat tire bike" as compared to Surly Pugsley, Moonlander, and others. It's a national trend and bike shops are selling them like hot cakes. Really, in this so called "awful economy" folks are going out to spend well over a thousand dollars on a bicycle. As good as that is to hear, I set about to build a bike the way I ride, middle way. I'm referring to cost as well as tire size. So far my "like new build" or "new to me build" has cost something around $442. 93. Yep and I have two rear wheels as I found a WTB Dual Duty 24" disc rear wheel with tube and Kenda Kinetics 2.6" tire all intact at a thrift store for $2.93. I later found a Mavic Disc Wheelset for $40 that I can select tires for as a more practical commuter bike. I prefer my brakes and shifters to be separate rather than the popular integrated models. I also prefer that the inner working mechanics of the shifters not be made of plastic as I have observed them wear out and are expensive to replace, particularly the integrated models. One of the reasons bar end shifters on drop bars are so popular with today's touring bikes like Surly's Long Haul Trucker. I found the precise component group I was looking for on a '91 Diamond Back Ascent EX that had hardly been ridden by evidence of no wear on original chain and original tires still had "whiskers". I considered sticking with that frame but it was too small at 17.5" and I was looking to build a bike for touring with disc brakes.. Deore thumb shifters with index and friction options are still sought after and get a pretty penny in good condition on ebay. Paul Thumbies were over priced for this build. So, for $50 I purchased the entire bike, pulled the components which were all of the Shimano LX line including cassette, chain, crankset and rear derailleur. Of course I kept the DB frame for another build as the frame design is very interesting meeting some of the standards of a touring bike. Such as three bottle cage mounts with one under the downtube, longer top tube and chainstays. I also wanted to be able to add a rear rack with disc brake without too much hassle. Read Blog Post Here.  Mini fat tire bike with 24"x 2.6 Kenda Kinetics rear tire and WTB Dual Duty rear wheel Mini fat tire bike with 24"x 2.6 Kenda Kinetics rear tire and WTB Dual Duty rear wheel Photo shows compatibility of Kenda Nevegal 26" x 2.1 on front with Kenda Kinetics 24" x 2.6" on rear. Due to the size of the rear tire it doesn't effect riding position enough to be noticeable and sure makes for a fun trail bike with aggressive tread pattern on rear. 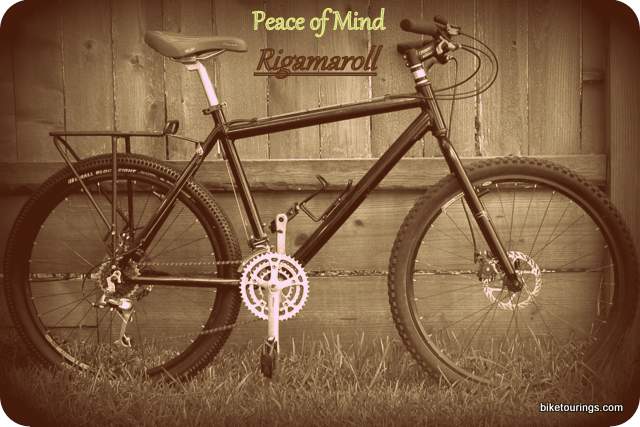 Kenda Small Block Eight with Nevegal on front for Commuting. Kenda Small Block Eight with Nevegal on front for Commuting. For commuting the Kenda Small Block Eight is used in place of the Kinetics for low rolling resistance on pavement and dry trail surfaces. Nevegal on front maintains sure handling. A bicycle that rolls fast for commuting with lots of starts and stops, ability to take on pot holes, ride across grass, etc. Oversized 31.8mm Mountain Riser Comfort Bars provide sure handling with loaded commuter panniers and handles changes in riding surface. 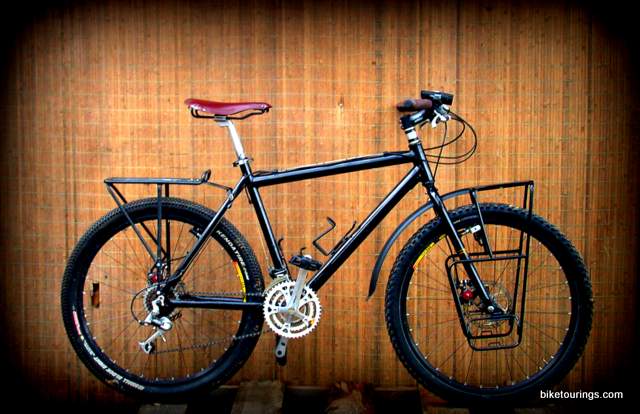 Nashbar double butted aluminum mountain bike frame build completed as a touring and trekking bike with Minoura MT 4000-SF front pannier rack. Added Selle Anatomica NSX leather saddle. Very pleased with how this bike turned out. Vintage Steel Lugged Frames for Touring and Commuting Bike Projects Back when gas was far less expensive I owned a '69 Oldsmobile Vista Cruiser Station wagon. What a cool old ride with the exterior primer grey, moon roof and electric rear window for my dogs to conveniently jump in and out of. I got to reminiscing about that old car when I found another cool old ride in the form of a '70's Vista Summit steel lugged 4130 cromoly frame. Found an old promotional ad and the quote of "Pull Over There's a Vista Cruiser Coming By" has me a bit nostalgic of that old car and my dogs, good times, lots of travels and as I lay here kicking it with my current dog, Rooch it's amazing how much my life has changed since those days. Speaking of making changes for the better in one's life, this old bike I found while cruising around with and old childhood chum is in keeping with my sentimental feelings. We found this retro cruiser style road bike with beach cruiser handlebars, levers and shifters zip tied to the sides of the bike, wobbly hubs, headset and bottom bracket. Poor old thing was definitely not worthy of riding but I could see the beautiful potential waiting to manifest with a bit of TLC and spare parts I had in my shop. Bike originally had 27 x 1 1/4 wheels and tires. Even though I was able to salvage the wheels by overhauling the hubs and truing them up, I nevertheless decided to replace them with 700c wheels and put on some fat 700 x 40c commuting tires adding versatility and performance on varying terrain.
Here's to keeping and creating good memories this Holiday Season from our bike family to yours, Cheers!, Rideon 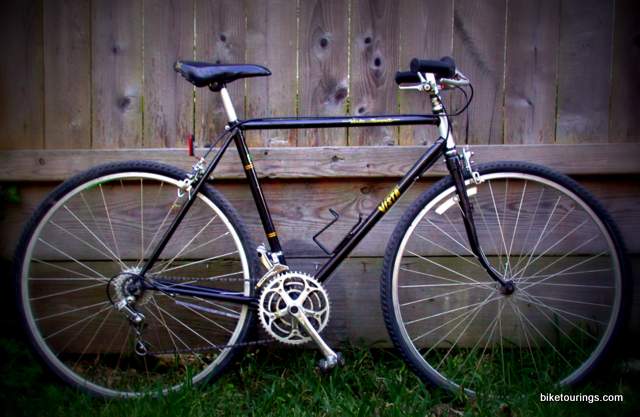 70's Vista Summit with steel lugged frame, 24 speed and 700c wheels |

Top 100 Bike Touring Blogs 2018 We're at number 22 this year. : )

This blog featured with several other awesome bike travel sites
Co-op Garden Fundraising Ride
Click on Photo for More Information


Bike Tourings' BlogProduct Review Blog for Bike Touring and Commuting Accessories, Components, Equipment and Gear. With many how to and repair tips. Go to my Photography Blog. Or use the search box provided below to search this blog.

Powered by Benchmark Email
Author,
|


 RSS Feed